 On October 4, 2011 Certified Renovators will be allowed to take paint chip samples as allowed by the Renovation, Repair and Painting (RRP) Rule. What has not been discussed is how to properly take a paint chip sample … until now.
Warning: Paint chip sampling is a destructive test. It will produce small quantities of lead dust and debris, so proper precautions should be taken. For a full description, please order ASTM E 1729 standard.
Overview
The main goal of paint chip sampling is to get a 4 inch square (for most labs) of all the layers of paint, without any of the substrate. The sample is then sent in an approved container, with the proper paperwork to a EPA recognized laboratory.
If the testing shows that the sample is 1 mg/cm2 or higher in lead concentration, RRP applies. If the testing shows that the sample has less than 1 mg/cm2, then RRP is not required.
Preparing the Site
- A 4 X 4 foot piece of plastic should be placed on the floor/ground underneath the sample area to catch any dust or debris.
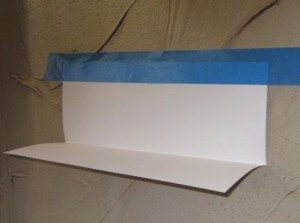
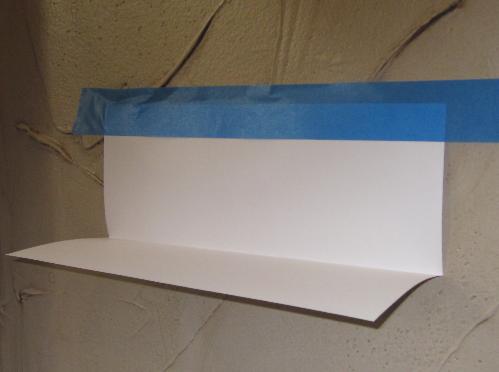
- Take a sheet of heavy stock paper and fold it length wise and tape it underneath the sample area to collect any falling paint. This is the catcher.
- Measure and mark a 2 X 2 inch (1 x 4 inch or any combination that equals 4 square inches). The area marked should be within 1/16 of an inch in accuracy.
- Place any supplies and tools inside the plastic sheeting.
- Put on disposable booties & gloves. A N100 respirator should also be worn.
- Score the outside (edge) of the sample area with a utility knife.
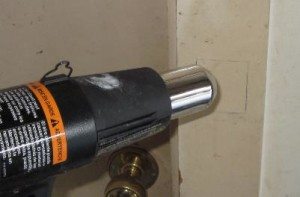
- Use a heat gun (1099 degree Fahrenheit or lower) to soften the paint. Hold the heat gun 6 inches or more away from the sample area. Do not burn the paint. When the paint softens and/or blisters, scrape off paint and put into a plastic container. All layers of paint should be removed. No substrate (or as little as possible) should be disturbed.
- Put any dust or debris from the catcher (folded piece of paper) into the plastic container.
- Put any dust or debris from the 4 x 4 foot plastic sheeting into the plastic container.
- Seal and identify the plastic container. Identification should denote where and what component was tested and should also be identified as to the street address.
Repair Sample Area
Sample areas should be repaired to customer’s specifications. At a minimum, spackle, plaster or paint over the sample area.
Clean-up
- Clean tools and supplies with a wet wipe.
- Remove catcher, disposable booties & gloves and 4 x 4 foot plastic sheeting and place in a plastic trash bag.
- Use wet wipes and clean area. If area is carpeted, use a HEPA vacuum.
Sheetrock
On sheetrock (or any other flammable substrate) you should not use a heat gun. On sheetrock, you can score and remove the sample area and take every precaution to remove any paper backing or gypsum.
Paperwork
Most laboratories have a chain of custody form that should be completed before delivering or mail samples.
Retain results for a period of 3 years and give client a copy of the results.
Problem Areas
On certain occasions a 4 x 4 square inch sample cannot be taken. A smaller sample can be collected, but you will need to get the results in PPM or % by weight. Contact your lab for any special instructions.
Areas to Test
See this for where test should be made.
Laboratory Cost
Most labs charge anywhere from $10 to $20 for each sample test. To find an approved EPA laboratory, go here.
HUD
HUD does not allow Certified Renovators to do any type of lead testing.
Conclusion
Paint chip sampling is a costly and time consuming test. Thus, you will most likely find that this type of test is not financially feasible to do on most projects.


Yet another great read.
Thanks Darrell, Dean is a great contributor to BP!