You’ve properly prepped all the walls, all your tools are on standby and your high quality paint is waiting to do its job. Breathe easy; the tedious work is behind you. It’s finally time to paint those interior walls!
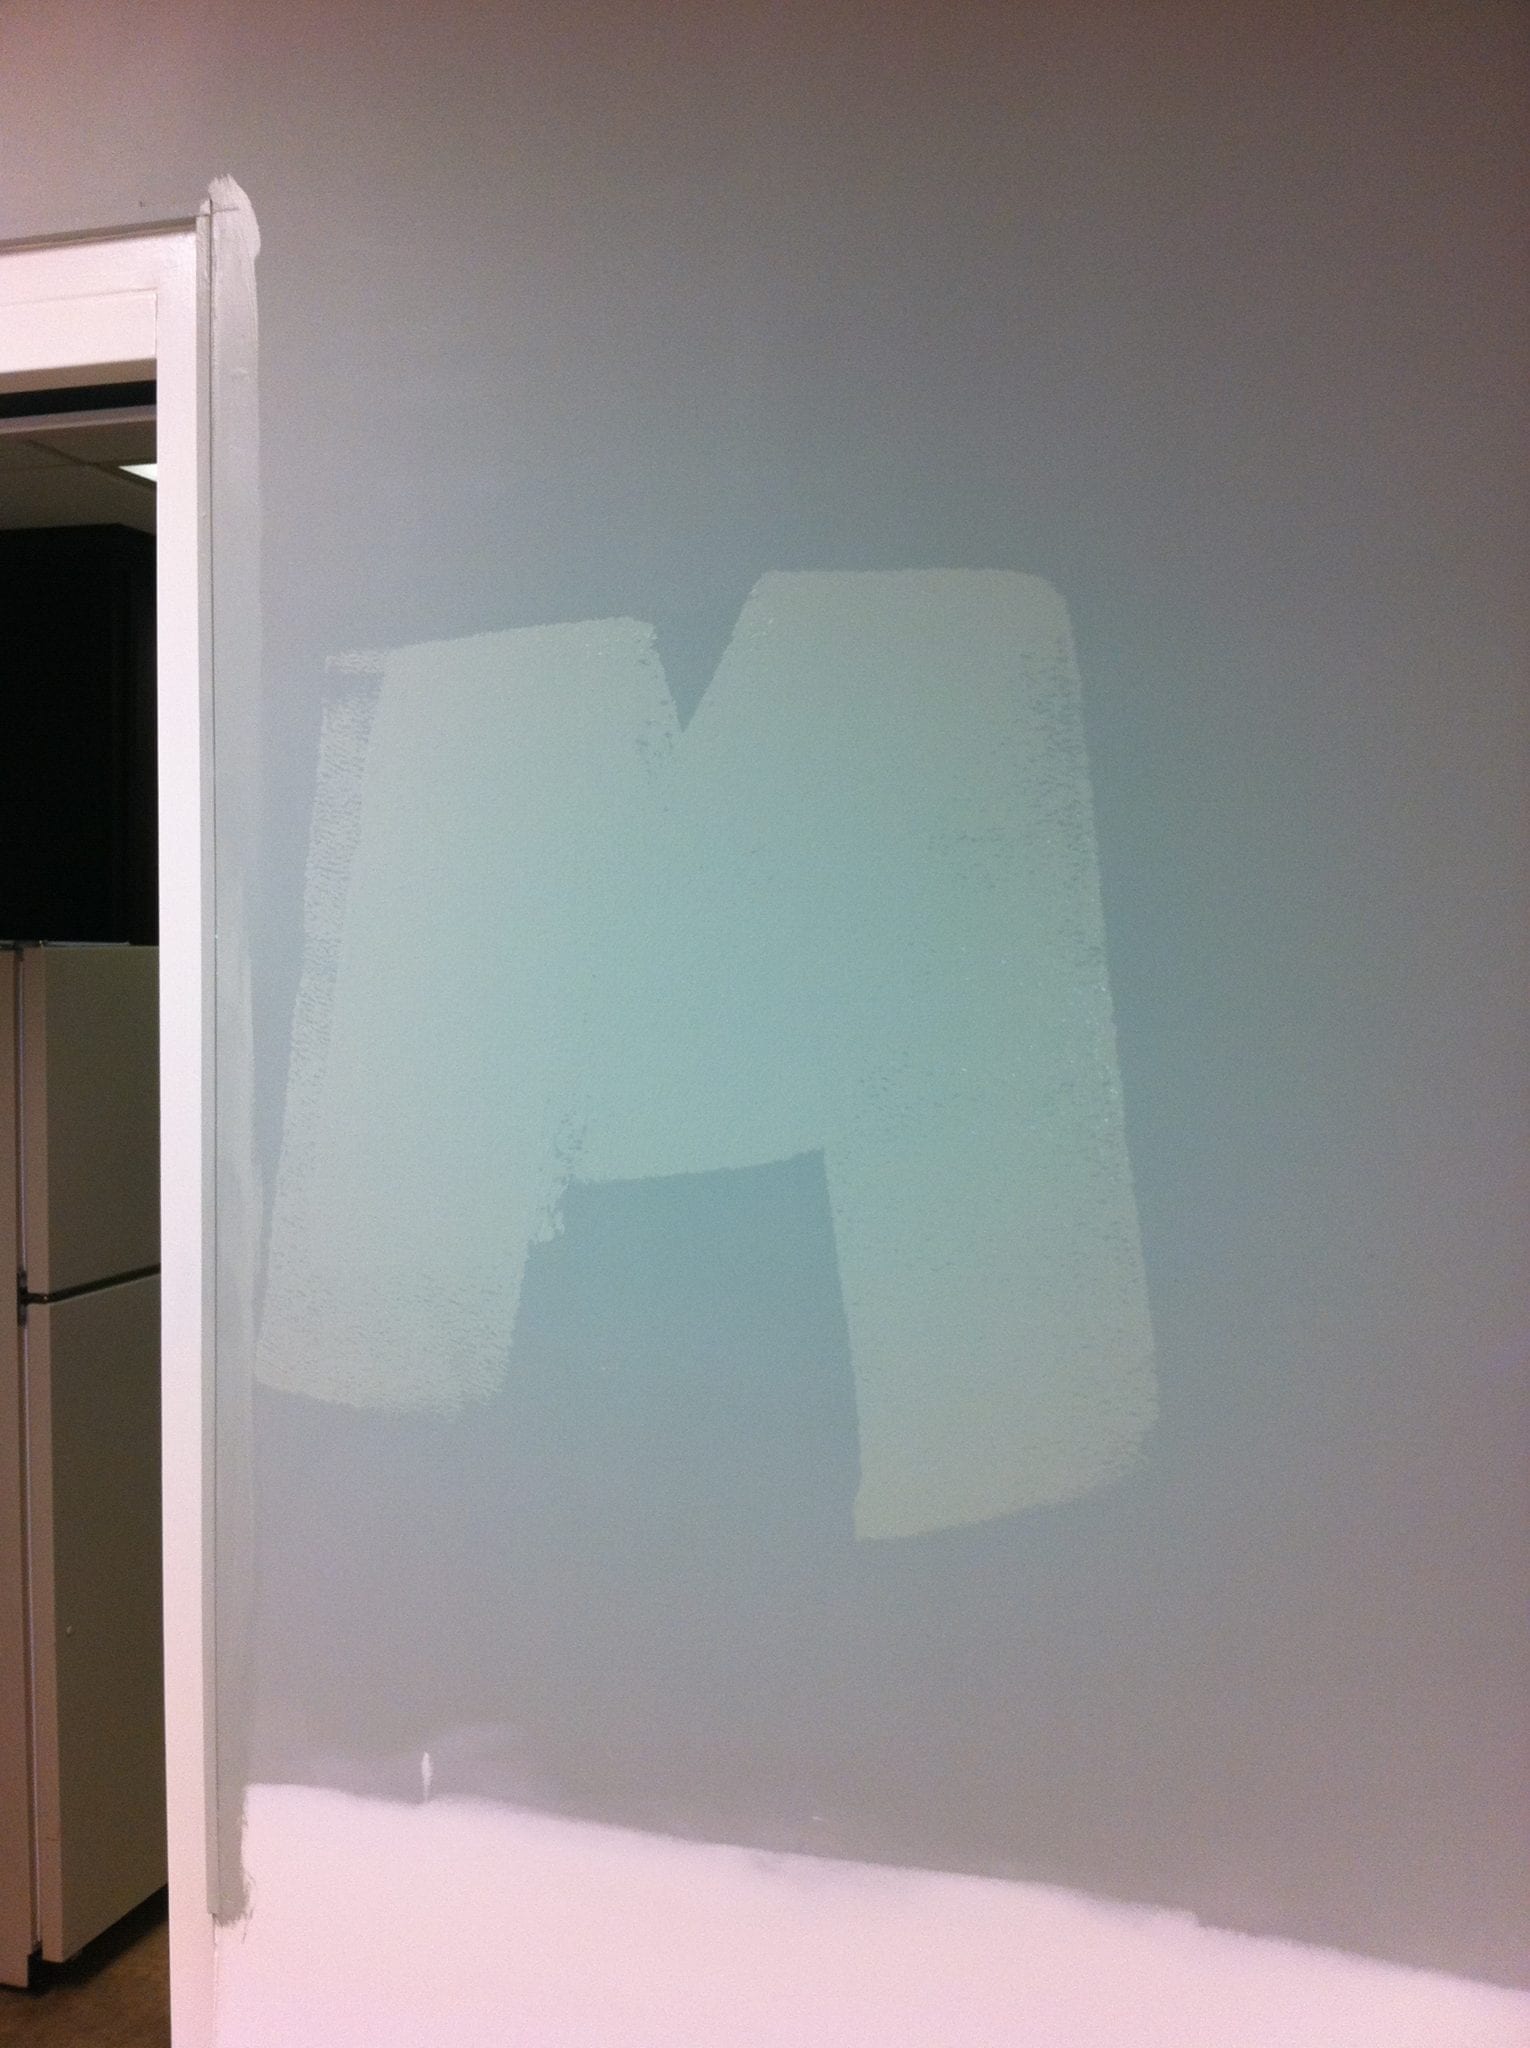
Technique plays a very important role in the outcome of your project. Each professional has their own preferred technique to rolling walls. In short, they all work. Some techniques better than others, but finding what works best for you is key. An efficient and popular technique among professionals is designating a 3×3 square foot area and working your way through the space square by square. Begin by rolling up. Starting with an upstroke prevents the paint from “pooling” at the bottom of the roller nap or running down the wall. Visualize painting the letter “M” in the 3′ square, without lifting the roller from the wall. Without picking up the roller from the wall, fill in the area in this pattern until the square is thoroughly covered. Pay special attention to ensure the paint is spreading evenly and the pattern is uniform. (See picture below)
Another very popular technique used by professional painters is starting half way on the wall with an upward stroke; stopping a couple feet from the top of the wall and then rolling straight back down several feet. Finish by rolling back up the wall until you reach the ceiling cut. Using this method will evenly distribute paint over the entire height of the wall and ensure it is rolled over enough to prevent pin prick sized holes where paint failed to cover. When using any technique, it is most important you feel comfortable and confident in your ability to roll and in your ability to distribute the paint evenly for a uniform finish. Something most novice painters (and a few seasoned ones) almost always do is roll too fast. This makes the roller nap “spray” paint off of it, resulting in tiny splatters everywhere. Using a drop cloth might help, but with any technique patience is key!
A tip professionals suggest is always stay in the paints wet edge. Following this rule will give you amazing results. When rolling, always “cut in” first and roll through the edges of the cut. If you allow the cut portion to dry first or cut in after rolling, the edges will be visible and will disrupt the uniformed look of the wall.
Paint quality and sheen also play a very important role in the finished look of your work. Years ago, oil based paint was suggested and used for every surface. Paint technology has changed and the recommended paint for your desired outcome has as well. If you want an outstanding finish with easy application and clean up, then water based (latex) paint is highly suggested. Latex paint has a number of advantages: It’s low odor and in some cases (Zero VOC) it’s odorless, dry time is minimal and is much more beginner/user friendly. Clean up is a breeze and latex paint typically costs less. With all these advantages, it is the “go to” option for circumstances where the owner still needs to inhabit the space or where there might be children or pets.
When purchasing interior paint, be aware of potential “gimmicks.” All brands advertise different features as to why their brand is superior. Some highlight the additives and technology used while some choose to highlight easy application and optimal coverage. Truth is, if you choose a premium paint (highest quality of any particular brand) chances are one brand is just as good as the other. Try to focus your attention on coverage.
Here are a few things to keep in mind when thinking about a paint purchase and what finish to choose:
- Glossier paints will showcase imperfections with the wall. A semi-gloss finish will show more imperfections than a satin finish will, while a flat finish will show relatively no imperfections. Ultimately the decision is up to you, but this is a little known fact to keep in mind.
- How often do you want to be able to clean your walls? While the flat paint might hide imperfections, it is not great for holding up to cleanings. Glossier surfaces handle scrubbing much better and are more resistant to humidity. Satin and eggshell finishes are a great option for bathrooms and kitchens where humidity tends to be present.
- How often will you need to touch up the walls? Glossy paints hold up to cleanings, but touching them up with additional paint will not blend easily and will show up! Flatter paints can be touched up with ease and blend seamlessly. They are a great option for a low traffic area such as a living room or bedroom.
- Always reserve semi-gloss for trim only!
You might find the need to compromise on some of these points. Consult a paint professional or choose paint with the finish you feel will work best with your needs. Live with the room and “feel it out” to see if the finish is going to sync with your needs.
Today, a paint can is literally a bucket of technology. You are the best judge in determining how you want your finished result to look and how to best make the technology work for you. The combinations are endless. Take the time to prepare your surfaces. Choose the paint that best suits your needs. Use the application technique that works best for you. It may take some trial and error, but quickly you will realize what technique suits you best. It is only a matter of education, time, practice and patience before you will begin to paint like the pros! If you would like further advice visit our website or contact Custom Coatings Inc!


